


Let's Manifest A Magical December
With a tutorial because it's that time of the year and not only!

I was thinking about making a very short Skillshare class with this topic but since time slipped by and it was impossible to do it, I am now jumping here to post again about this very special journal making routine of mine that features December 2021 journal.
This post contains my first part of the tutorial so grab a cuppa, read first and then dive in and enjoy :) Also, it will get cut off in your e-mail so better read it online.
December is almost here and let’s be honest, it can be a pretty rough month. It can also be a wonderful and magical one. Over the years, I’ve experienced both and realized, that the magical and special ones started happening when I chose to focus on the good happenings around me. So it was really only an attitude shift that I had to do in myself, but because I went through it, I now know it is possible and I am doing my best to live this way every day, every month. It’s a work in progress thing, I won’t lie, I till get quite depressed and bogged down but I am also able to pick myself up again much faster than I used to do. And making art and keeping some sort of a journal helps tremendously.
Soooo, how about we embark on a little monthly experiment and see how it changes the daily going-ons and how it affects our moods and views on things?
We will start by making our own special monthly journal for this. Why? Because, when we are using something we made AND when we make it with a special intention, that thing becomes very powerful. You can of course use an already made notebook or a sketchbook but I do ask you to go and embellish those blank pages in advance to make the whole thing more “yours” and while doing so, put in your intention for the month. To show the Universe that you are serious about this and that you are prepared to put some effort in. It’s how the Law of Attraction works. You get more of what excites you, of what makes you react. In a good or not such a good way.
And what’s the intention behind this, I hear you ask? Well, for me, it will be to have a month full of magical moments and signs and gifts from my Spiritual Teams that I will be able to write about in my journal. I will also be very mindful of how I will be spending my time during December and the moments I’ll get to be grateful for. Being in a grateful state lifts my vibration and the higher the vibration I have the better I feel. Those around me totally profit from this immensely as well :)
My number one vibration lifter is being creative, creative in any of the creative outlets out there – needle felting, cooking, gardening, drawing, painting, sewing, embroidering,... I usually go for some sort of art making and this also includes art journaling a.k.a. journaling with some added embellishing thrown in. Which is exactly what I will be doing through December with this project.
So, even if you don’t feel like being a very creative person or somebody who doesn’t know how to draw a stick figure – which I seriously doubt is the case as everyone IS creative they just might not be aware of it – do join in. It’ll be fun and you will definitely make your December much more magical. I promise.
TUTORIAL - PART I
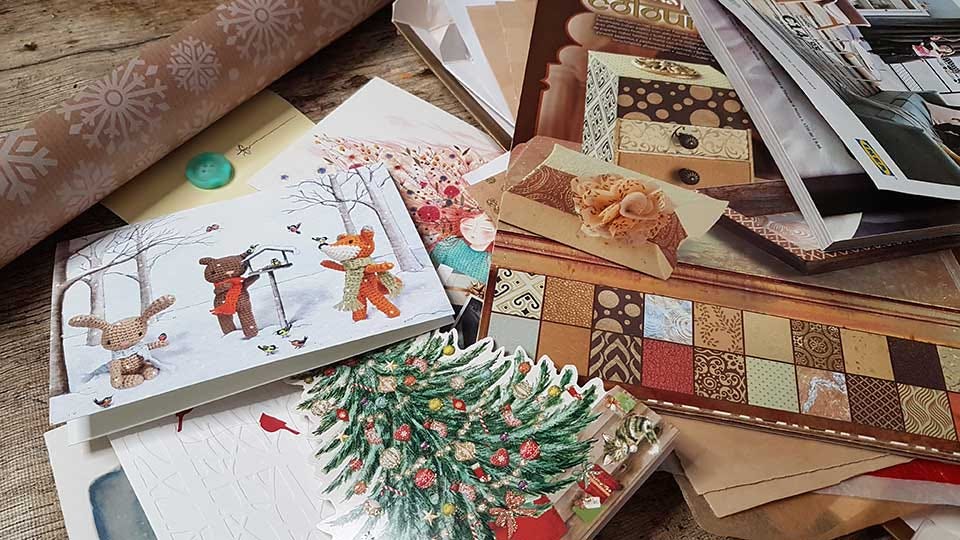
First of all, think about what makes December magical for you. Which colors, textures, images, smells, small things, etc and then, if you wish, pick up a color palette and dive into your stash of papers and search for anything that screams magical December to you.
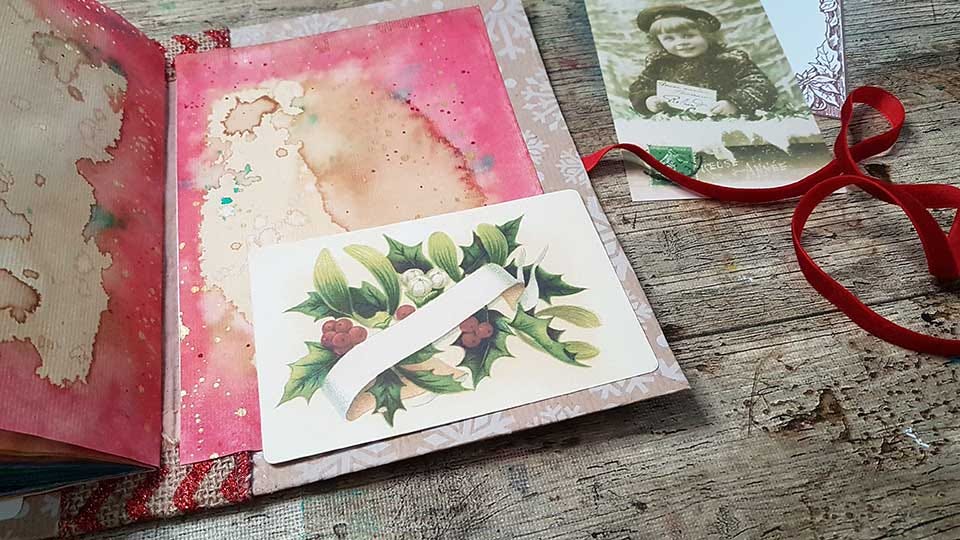
I was really drawn to old vintage look of papers (think coffee or tea stained), reds, my usual love - craft paper, anything really brightly colored with golden speckles over it and glittery stuff. I found the New Year/Christmas cards I received at the end of last year and decided to incorporate them in my journal as they hold so many beautiful wishes and are related to this year that is coming to an end. I also wanted to include my gift wrapping paper that I just bought. In a way, my choices reflect cosy time for me. Time to slow down, have a cuppa with a book and a candle lit somewhere. If I connect December with anything, it is all the lights everywhere. I love fairy lights and I have them turned on pretty much all the time, especially in these shorter days of winter time.
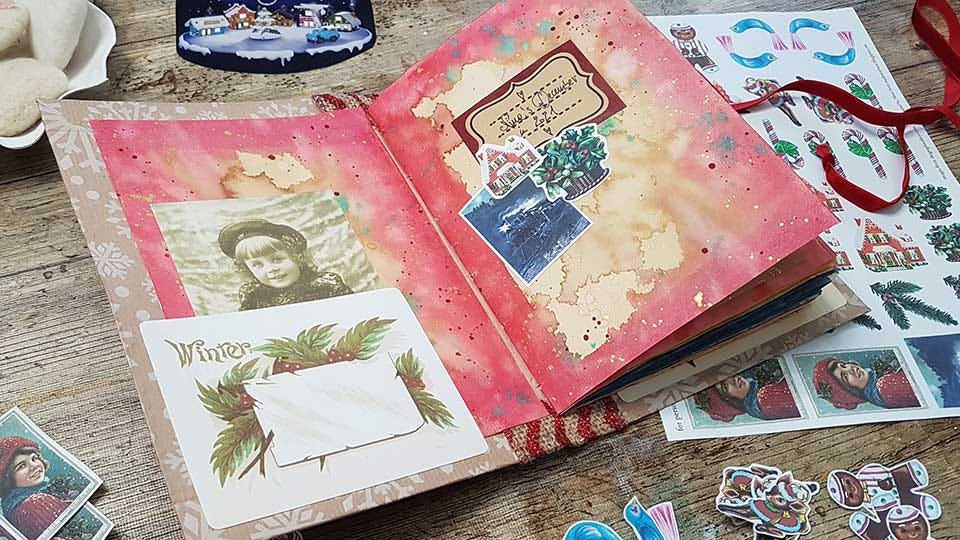
I decided I will use recycled paper for my journal as it has this vintage brownish hue to it. But I wanted to spend some time with each paper before it ended up in my journal, so I painted them all. On both sides. Two papers were painted with coffee only and the rest with watercolors, but only at the two edges. You'll see on the photos. I chose my new wrapping paper for my covers and found some images of old vintage postcards online to use as pockets at the beginning and the end of my journal.
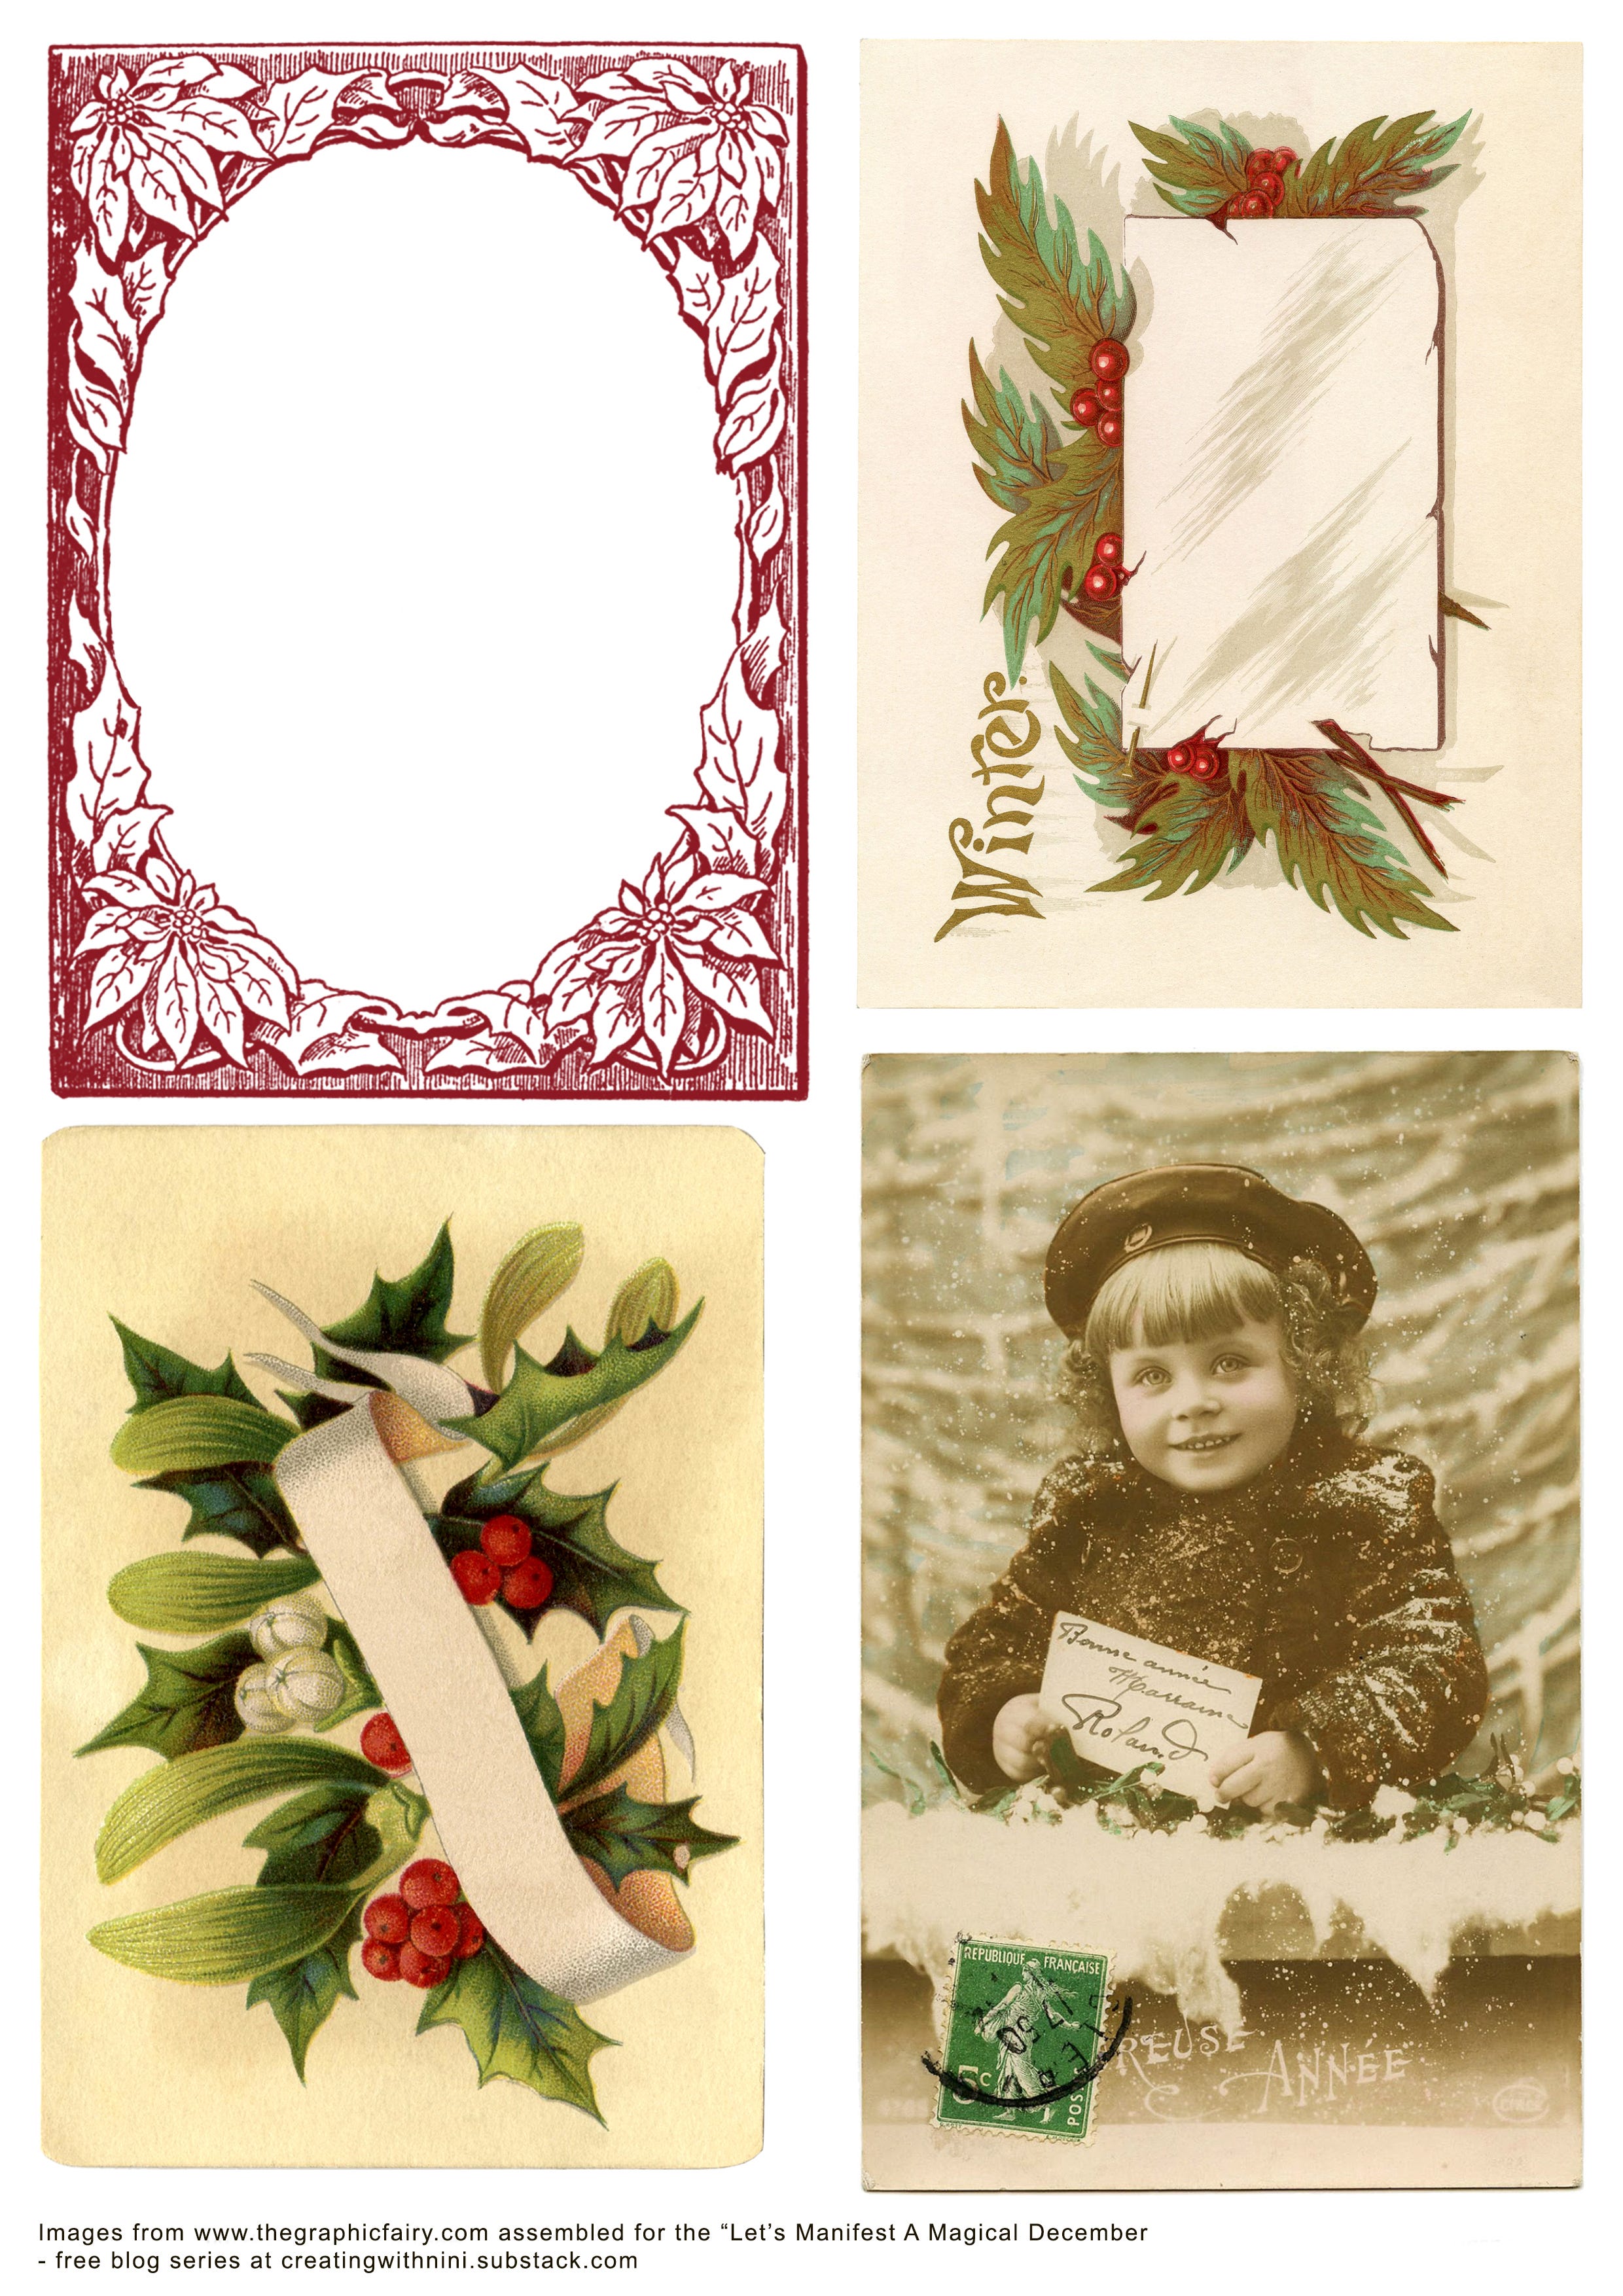
These are the cards and you can print them out too if you like them.
Click on the image to enlarge it and save it to your computer.
STEP 1
Decide on which kind of paper you will use to make your journal with. It can be ordinary printer paper, cheap kid's watercolor paper from A3 size pad, old book pages, old printed papers you no longer need - recycling is great for these journals.
Also decide if you want to add some color to these pages or not. If yes, then start splashing some color on or paint them fully, whatever you feel like doing is perfect. Especially when you actually and really do it ;)
If you want your journal to have only one page per day then all you need is 8 folded papers (one folded paper gives you 4 pages). 8 x 4 = 32. Perfect count as it gives you one page just for your title.
Decide also on what you will use for your covers. I went with an old chocolate box cover but could just as easily went for cardboard from one of the amazon boxes, or cereal box cardboard... anything really that is a bit thicker than the paper you will use for the inside of your journal.
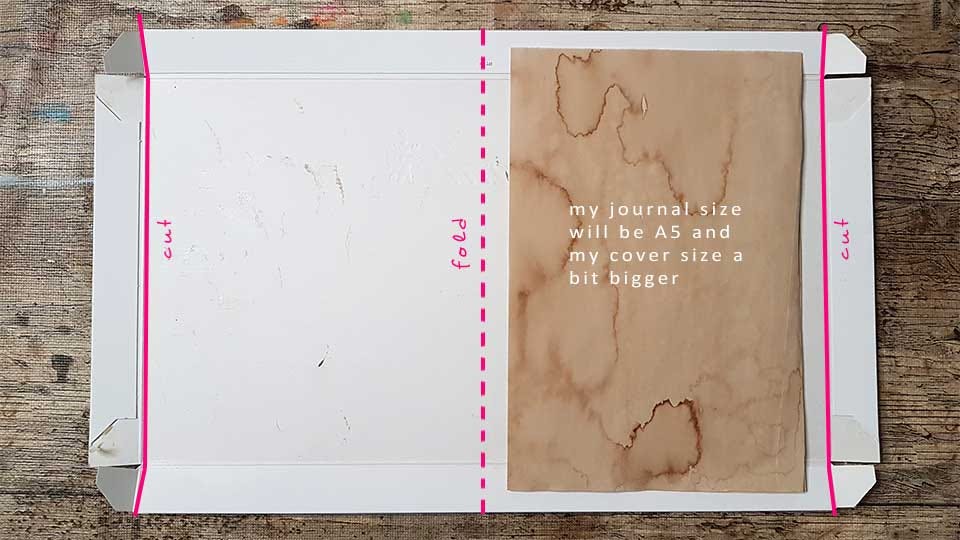
Final page size determines your cover size as the covers are usually a bit bigger to accommodate for a bulkier interior of one signature book we are going to make. My final page size was A5, which is an A4 sized piece of paper folded in half. If you are going to use different sized papers for your journal - which looks super cool in the end - your biggest page dictates your cover size. Just telling you :)
STEP 2
A step by step for making thicker covers for your journal.
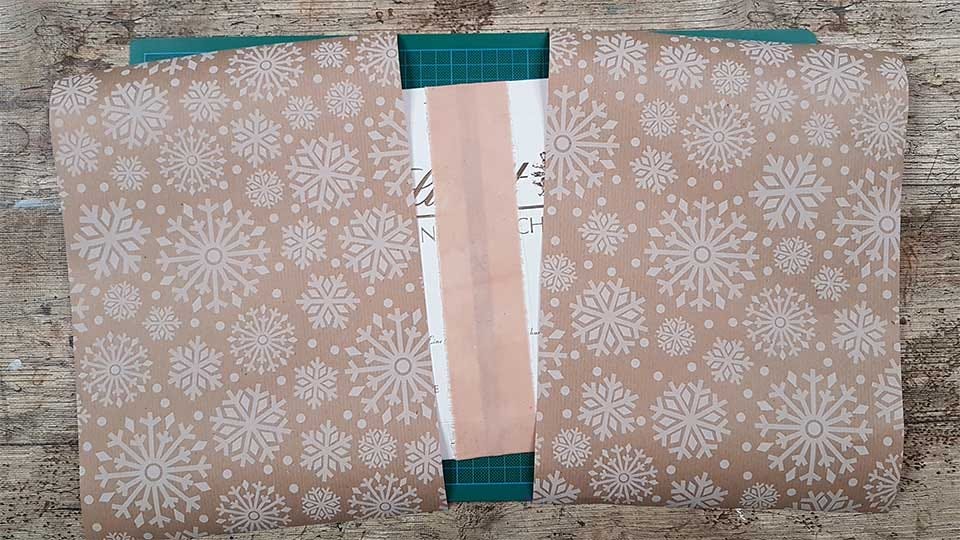
1. Here you can see my A4 coffee stained paper folded in half put over the flattened chocolate box cardboard as I was assessing the sizes.
I cut away those flaps on the left and right side but left the upper and lower ones as I wanted to use as much of this box as I could. Those flap folds on top and bottom didn't bother me as I knew I will be gluing more paper over this and everything will get much sturdier.
2. Then I folded my chocolate box paper in half and cut it on the fold to get two identical pieces for my covers.
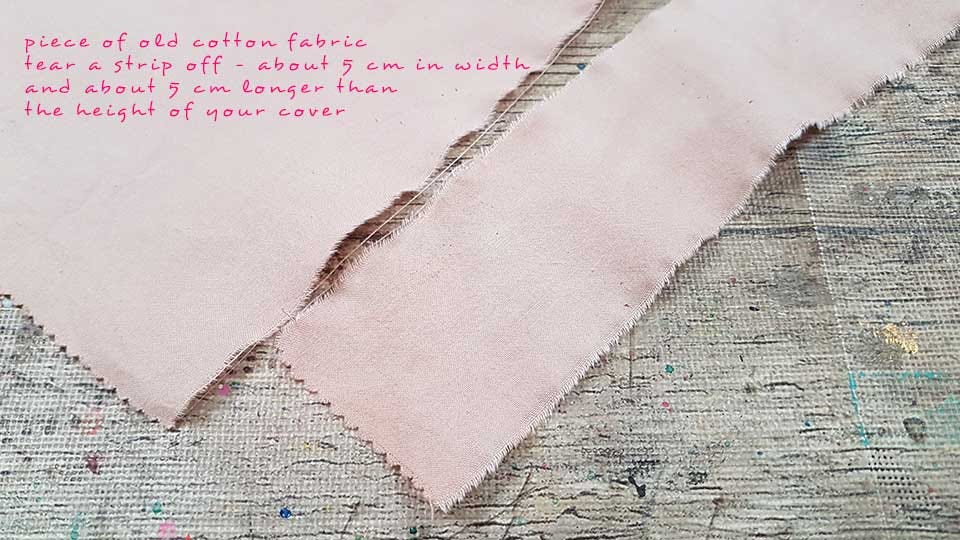
3. I took an old piece of thin cotton fabric and tore away a strip about 5 cm in width and length that was about 5 cm longer than the longer side of my book covers (also known as spine). You can take a piece of wide ribbon if you have it.
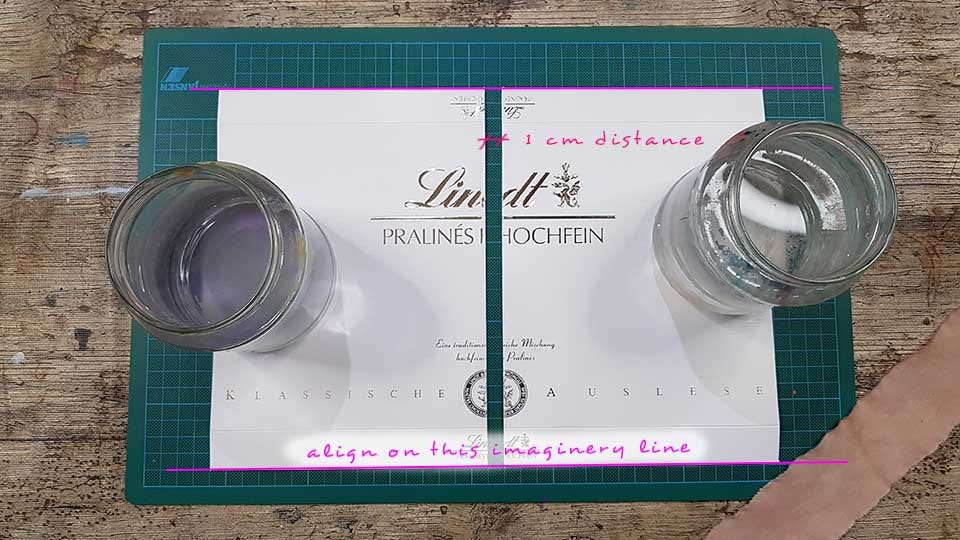
4. Take both covers and put them side by side with a gap in between of about 1 cm. Align them so that they are on the same bottom line so to speak (or top) - see photo below. Then secure them in place with something heavy so that they don't move.
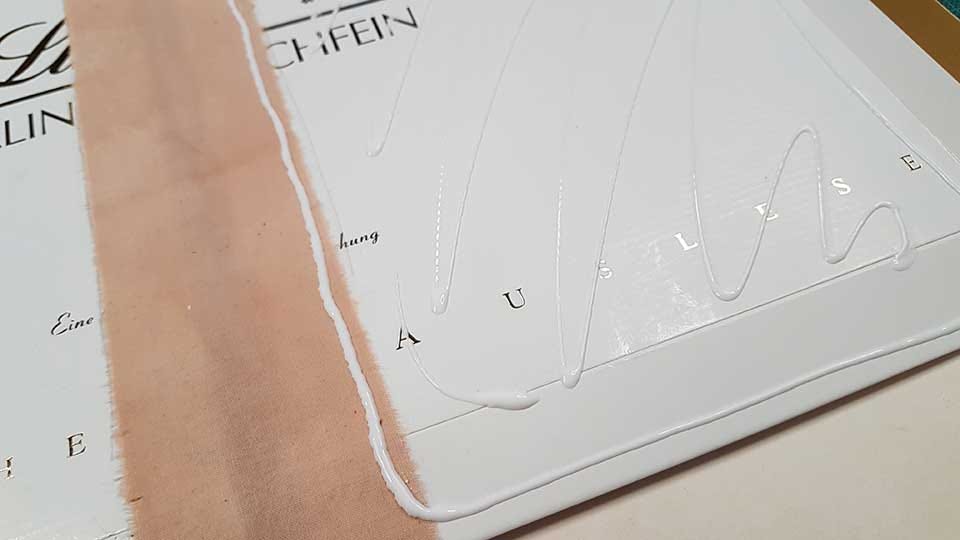
5. Now glue on your strip of fabric in the middle so that it connects both covers. It should look over top and bottom edges:
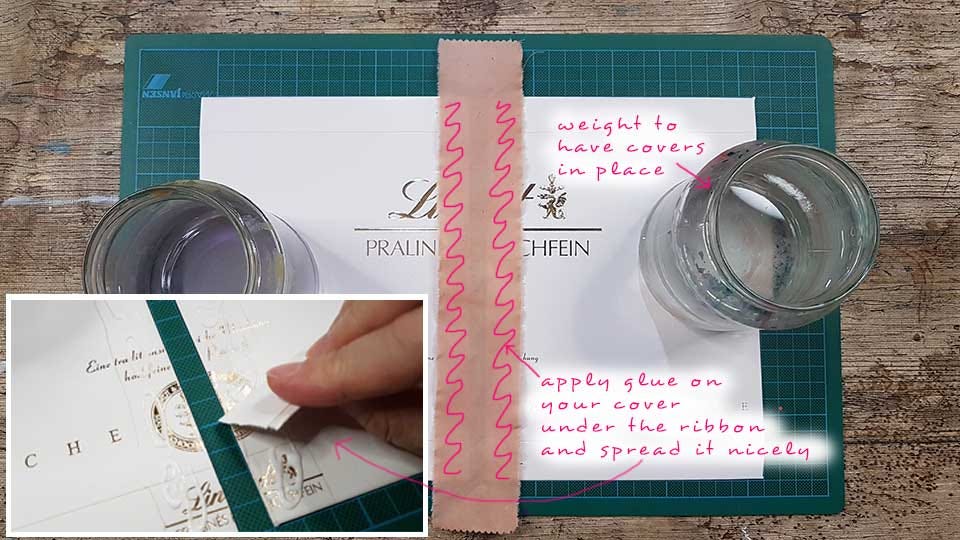
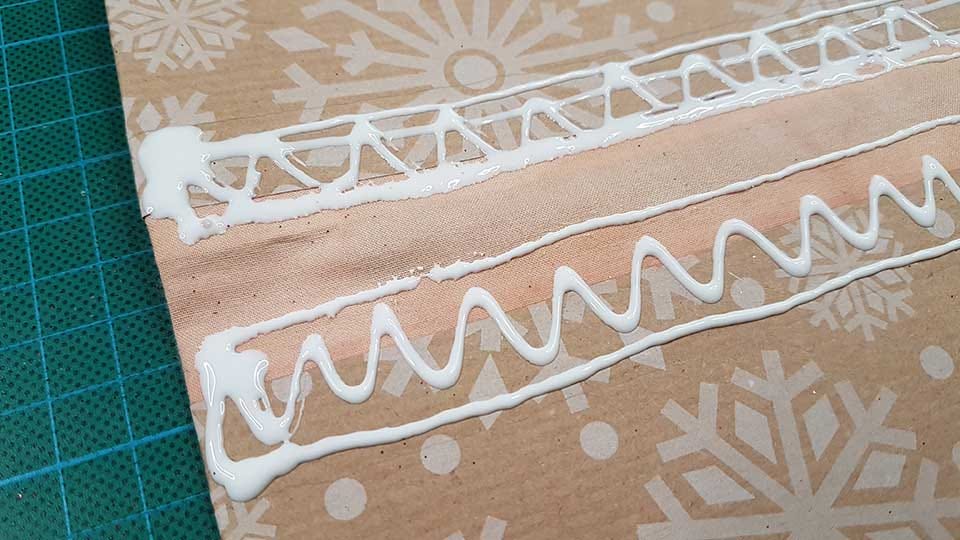
When you apply your glue - I am using white wood glue that dries clear and quick - spread it over the surface with a scrap piece of cardboard or an old credit card. Apply more glue if the paper is very old and absorbs the glue before you can even reach for your fabric ribbon to glue it on.
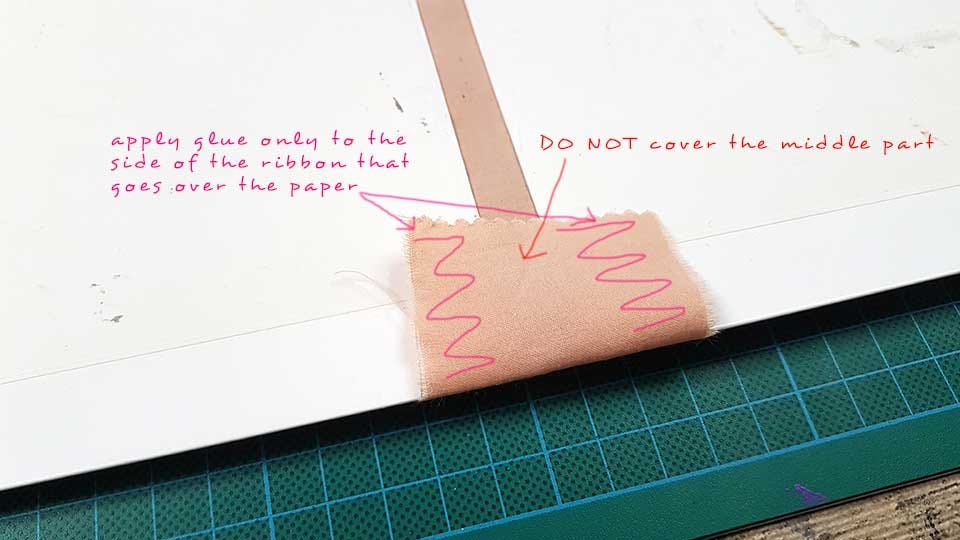
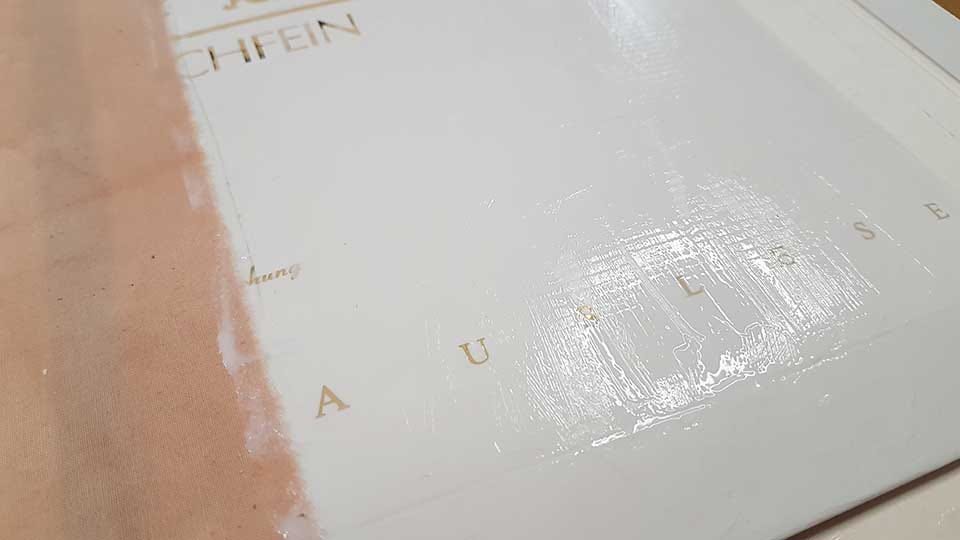
6. Turn your now joined covers around (when the glue is dry) and fold back the remaining of the fabric strip and glue it down as well. DO NOT glue in the middle of the fabric ribbon (where there is no paper) as this will make your fabric thick and sturdy and we don't want this:
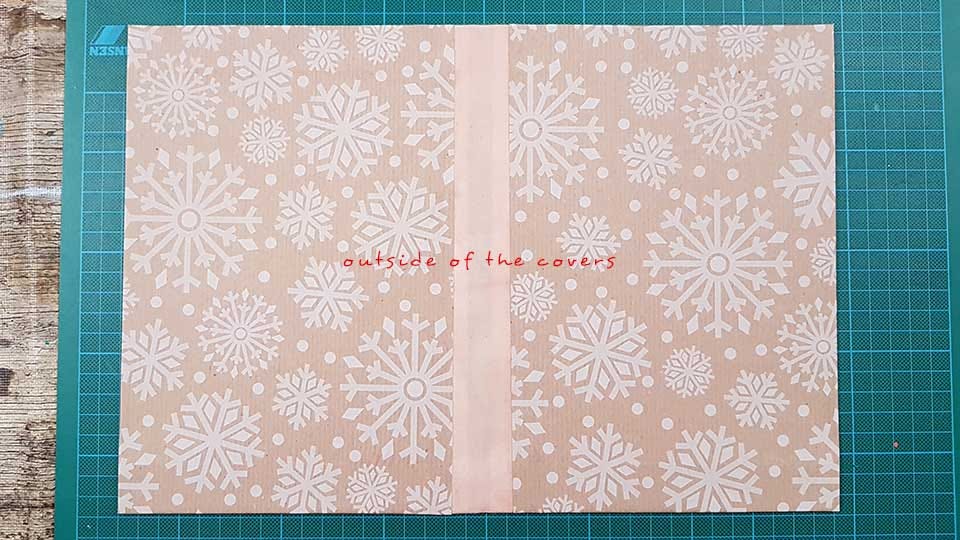
7. When this dries take the paper you will use for your covers and cut it to size that is a bit bigger bigger then each of your current two pieces of covers:
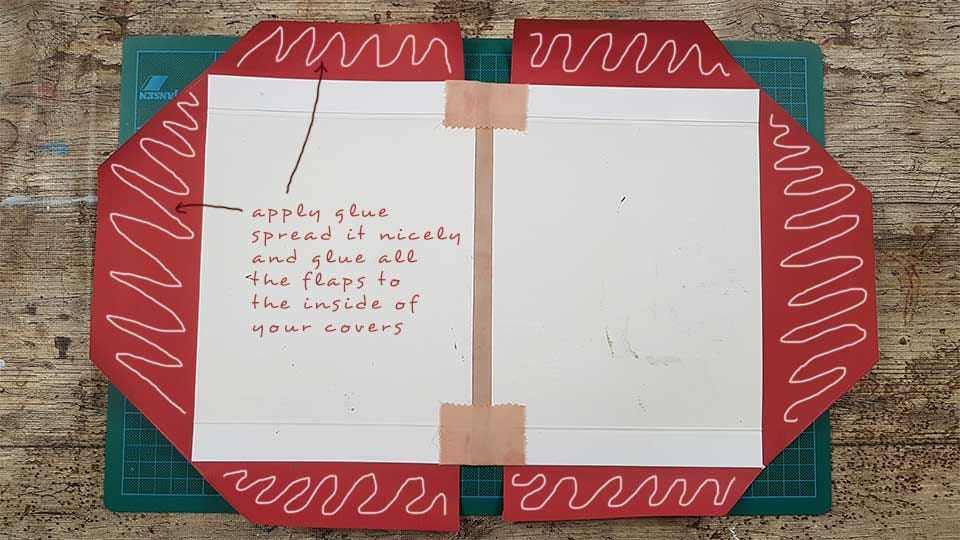
8. Apply glue over the front cover - spread it around nicely then glue on your pretty cover paper - leave some of the fabric ribbon to be seen (if you wish to do so). Repeat on the other cover (back cover):
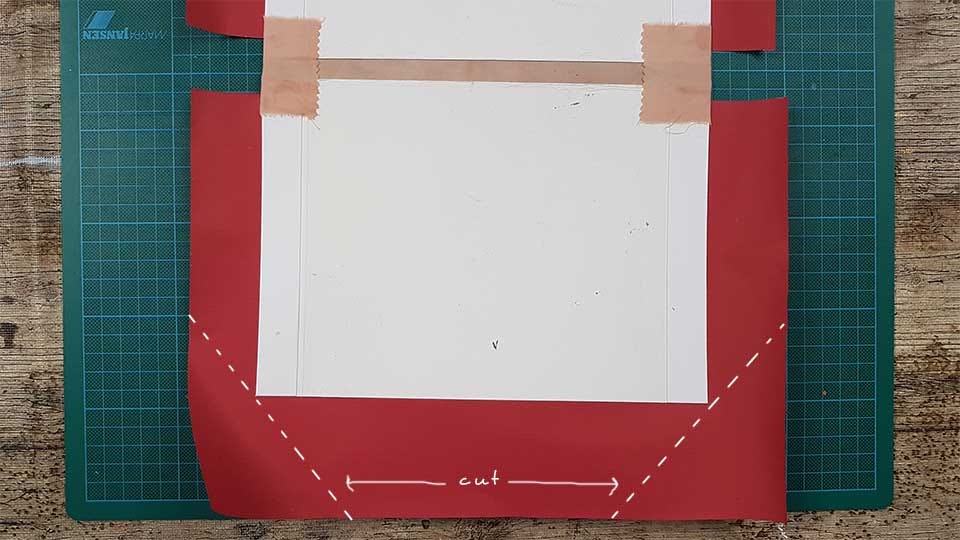
9. This photo shows how to cut away all 4 corners from your just glued down cover papers to get something that looks like this: (my paper was red on the other side)
10. Glue down your flaps:
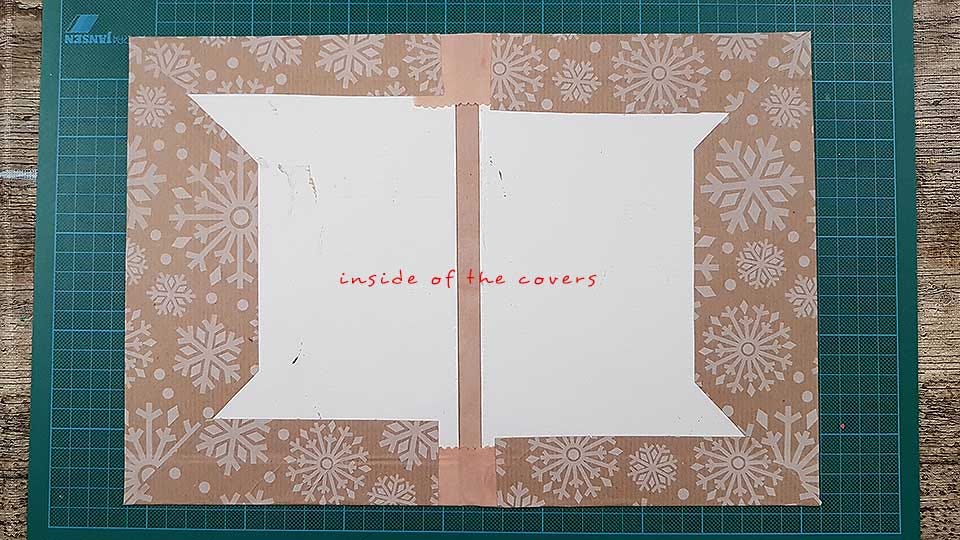
11. After gluing the flaps in you will get something that looks similar to this:
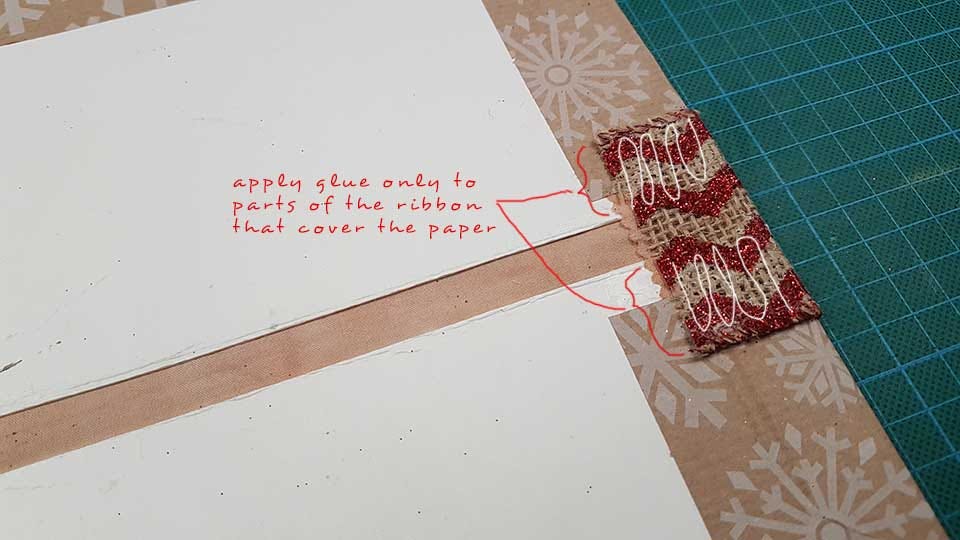
12. Now this step is not necessary and you can move onto adding pretty papers to the insides of the covers - next step - but I'll show you what I did as I found this pretty ribbon that I just couldn't resist and just had to add it above my pre-existing fabric ribbon. I was paying much attention to NOT get glue in the middle of the fabric (where there's the gap between two covers). Also on the inside where my ribbon had to be glued down:
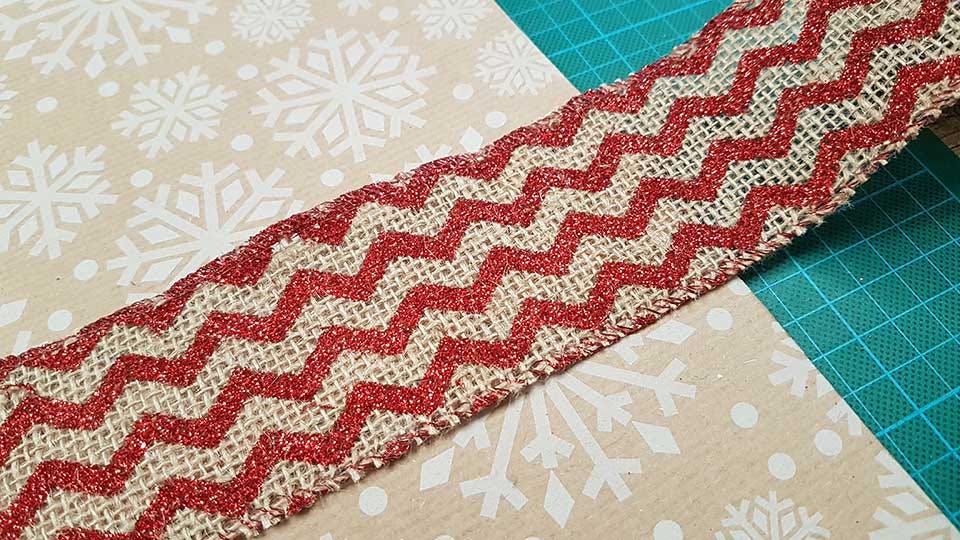
13. Glue the added pretty ribbon to the inside as well. Again, do not put glue on the spine:
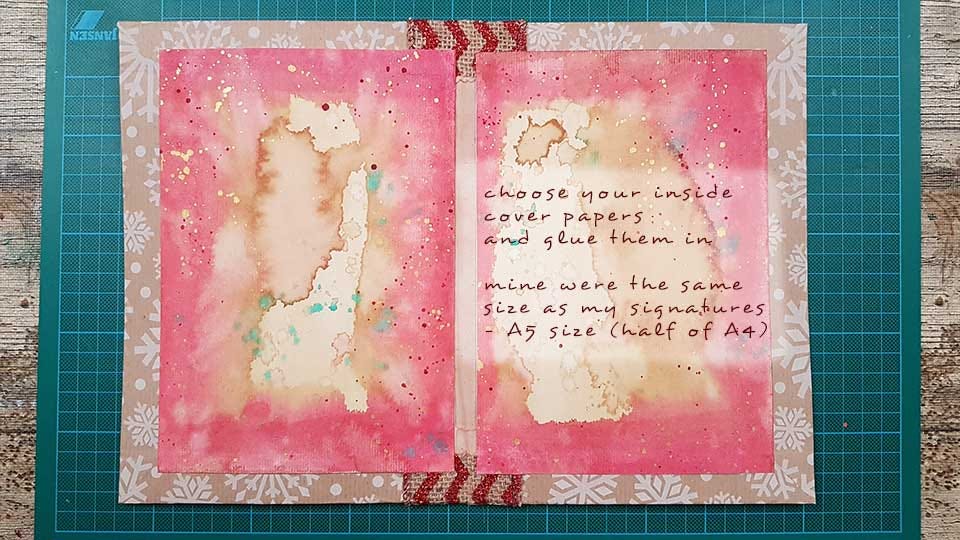
14. As a final step of making our covers we need to add some pretty papers to the inside too. I used one of the papers I painted with coffee and watercolors as it was the same size as my pages will be. If you'd like to do the same, then set aside your covers now and return to them once you have your painted papers ready. If you would like to use the same paper for the inside as you used for the outside then that's perfect too. Just cut 2 identical rectangles of that paper and glue it on the inside of the covers like I did here - only over the paper, NOT over the fabric in the middle. See photo below - the gap between two covers must remain visible:
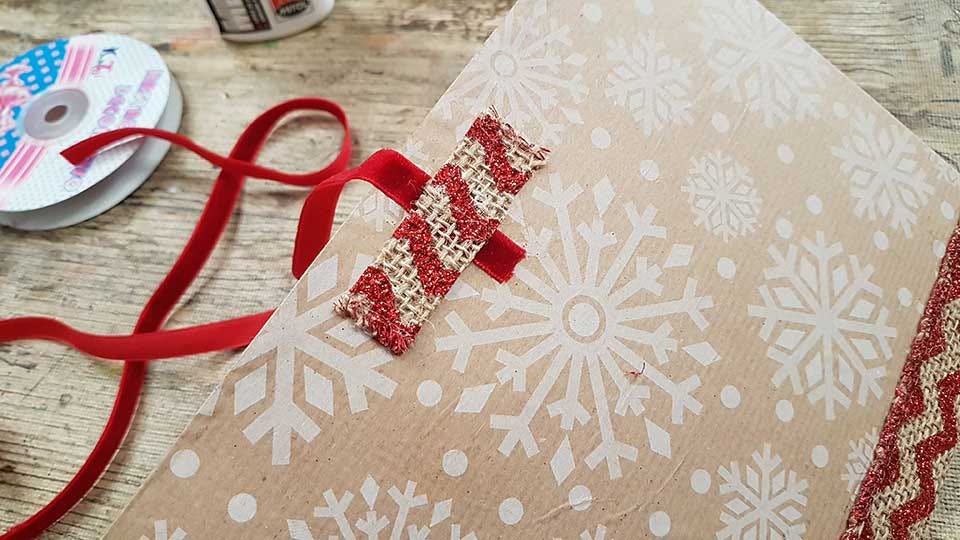
15. This is pretty much it when it comes to covers and you can stop here. I however, love to have some sort of a closure for these journals as they tend to get nicely bulky and I want something to hold them together, so I added a red velvety ribbon to act as my closure strap. I cut a length of it that wrapped my two covers 3 times and glued it on the back cover with a strip of my pretty ribbon I used over my book spine. Firstly I glued the velvety red ribbon then I glued the strip of the other ribbon across it:
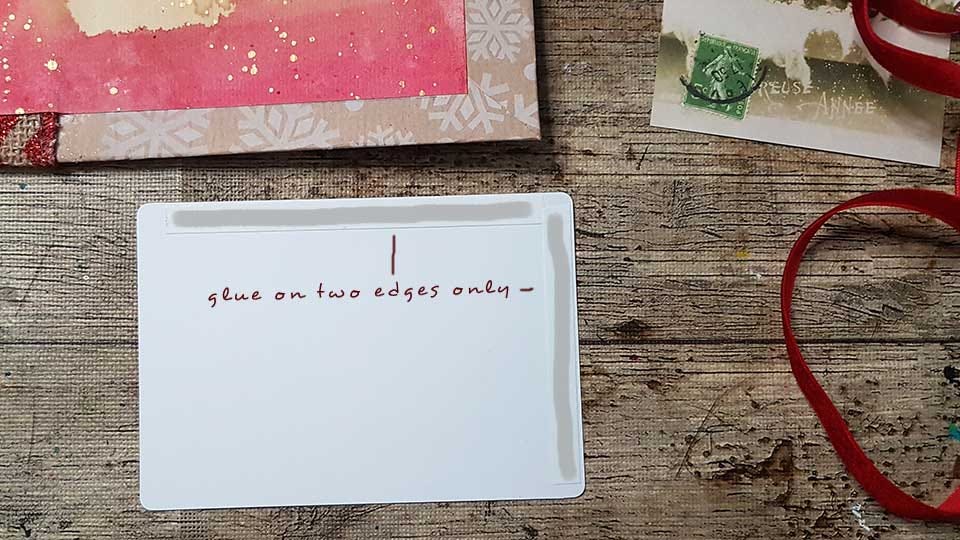
16. And the final touch was adding two "pockets" on the insides of my covers. I printed these vintage postcards on thicker paper, cut them out and glued them onto my covers. I applied my double-sided glue tape to only two edges of the postcards so that I can stick stuff inside. I know they will both come handy. You can also glue an envelope to your inside covers so that it acts as a close-able pocket.
Final words for today
All of this may look hard and long to do but in reality it's really not that much. Making colorful inside papers tends to take more time as they need drying but if your space is warm then that's not that long at all either. I made my covers and assembled my whole journal in one sitting. Trust me, it is totally possible to make the whole thing in one day if you put your mind to it. Enjoying the creative process is what counts the most.
I will continue this tutorial in part two as this has way too many photos already and I want to give you some time to mull over everything. But I sincerely hope you go and make yourself this special journal.
See you tomorrow!
With much love,
Nina
Thank you so much Nina! This written tutorial adds to the former session way back and meets my need of time and checking back again and again. I have the idea of making this project part of my Silent Nights/ Omen Days preparation. I‘ll offer a guidance through this sacred time, again. Information will follow 💖